Dualboot encrypted Windows and Ubuntu
Install Ubuntu 12.04 with encryption
Ubuntu is a popular linux distribution with lots of software available in libraries called repository’s. These repository’s contains lots of software for all kind of purposes, including disk encryption. The encryption software for Ubuntu can be configured during the installation, but that’s not possible with the standard desktop installation CD. The standard Ubuntu desktop CD offers you to encrypt your home directory, but not the whole system including swap space. Ubuntu also delivers an alternate installation CD with text mode install. This alternative CD contains an enhanced partition program which allows you to create, modify and delete encrypted and LVM volumes. You can download the alternate installation CD here.
This Ubuntu guide assumes that you already have installed Windows as written before.
Starting text-mode installation from Alternate CD
Start your computer from the Ubuntu alternate install CD and follow the instructions below. I will skip some general installation steps but will explain the steps that matters. One thing about the text based installer, it has a very old school interface, use the TAB and arrow keys to navigate through the interface. Click the images for a larger view.
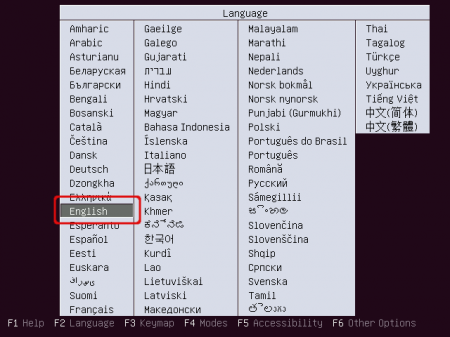
When booting from the Ubuntu alternate CD this screen appears. Select your preferred language.
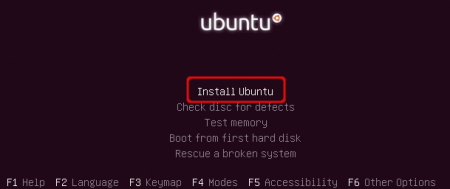
Select ‘Install Ubuntu’ to start the text based installation.
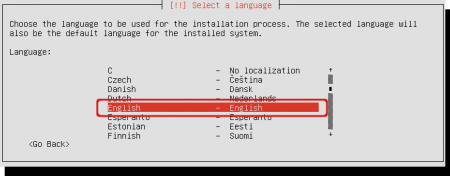
Select the preferred language during the installation procedure.
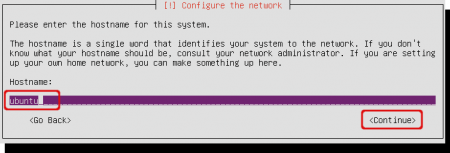
You must define a hostname. I kept the suggested hostname. Hit enter or tab to ‘Continue’.
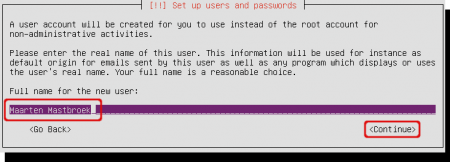
Fill in your name, it’s just info for creating your Ubuntu user account.

The setup suggests an user account based on your full name. You can change it if you want to.

Set a password for your user account.

Re-enter the password to prevent typo’s.

Ubuntu offers you to encrypt your home directory. This is not what we want, we go for full system encryption including the swap space. Home directory encryption can be useful when using Ubuntu with multiple users, but not when traveling around with a laptop that has only one owner. So choose ‘No’ for home directory encryption.
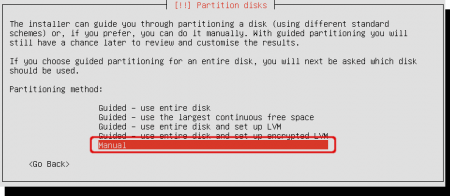
Select ‘Manual’ in the partition manager. None of the other options would let you to keep your Windows operating system and install a new encrypted Ubuntu installation.
Create boot partition
During the setup of Windows 7 we have deleted a 100 Mb partition which was otherwise used as Windows system partition. We’re gonna re-use that space for the boot partition. 100 MB is a bit small, but enough for at least two kernel versions. If you don’t have that 100 MB of free space, then you can create a new partition and choose a larger size, for about 500 MB. Note that the boot partition is not encrypted and therefor not included in the encrypted volume.
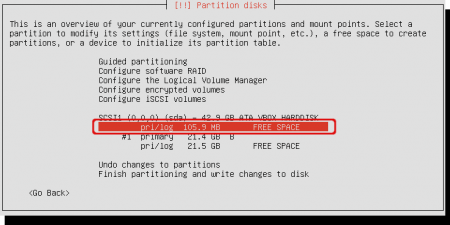
An overview of the partition layout appears. In this example I’m using the 100 MB of space left from the Windows 7 setup procedure. If you don’t have that 100 MB of free space, select the main free space to continue. Later on, you can choose to use only a part of it as boot partition.
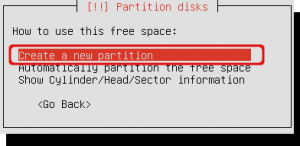
Choose to create a new partition.

Select the size of the boot partition. The wizard suggests the full partition size. In case of the 100 MB Partition, that’s fine. Otherwise, if you selected the main free space use about 500 MB, certainly not more.
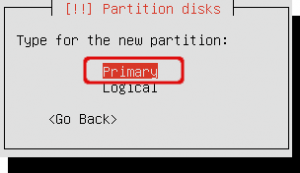
Select primary to make a primary boot partition. When creating a new partition out of a larger free space you get a question if you want the new partition at the start or the end of the available space. If that’s the case choose ‘Beginning’.
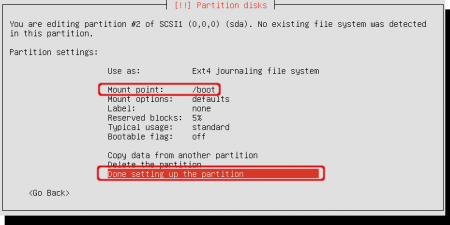
Change the mount point to ‘/boot’. Just select ‘Mount point’ and a new window will appear containing the ‘/boot’ option. Close this window selecting ‘Done setting up the partition’.
Create encrypted volume
We will now create an encrypted volume. During this phase you have to set a password for the encrypted volume. Let me remind you that this password has nothing to do with the password for your user account or root account. It is a password exclusively used for encrypting the volume. Also you can choose if you will not only encrypt new data written in the encrypted volume, but also overwrite data left by usage in the past.
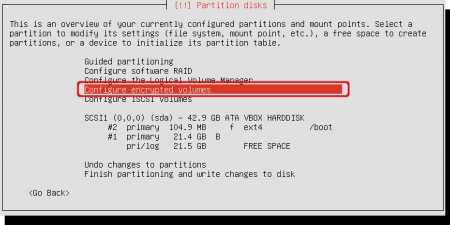
Just for you information: the install window shows that the boot partition is created under partition #2. Now create the encrypted volume. Select ‘Configure encrypted volumes’.
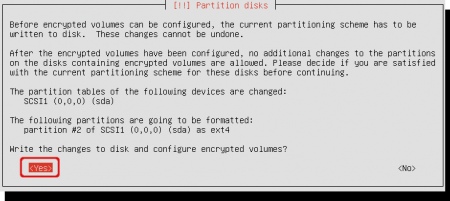
The wizard first wants to make changes to the harddrive. In the previous step we have created the boot partition, confirm with ‘Yes’ to write changes to disk and continue to create encrypted volumes.
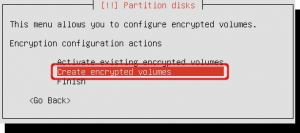
Select ‘Create encrypted volumes’.
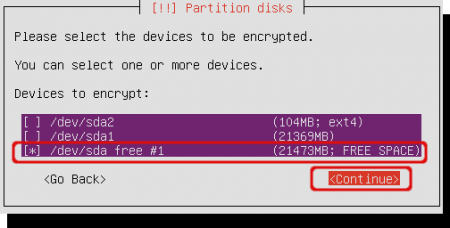
Select the remaining free space to create the encrypted volume. Place an asterisk (*) before the device using the space bar and select ‘Continue’.
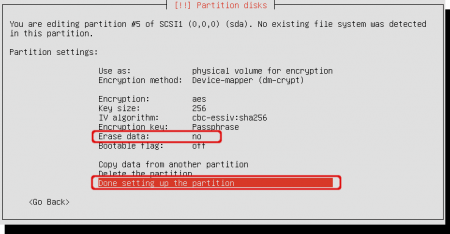
The volume will be encrypted with the given options. Note that default only the newly written information will be encrypted. If you want to remove all remaining data left from previous installations change the ‘Erase data’ option to ‘yes’. Later on, it will ask you to confirm the deletion of all previous data. The cleaning process can take a long time. In this example I will leave ‘Erase data’ to ‘no’ and select ‘Done setting up the partition’ when finished.
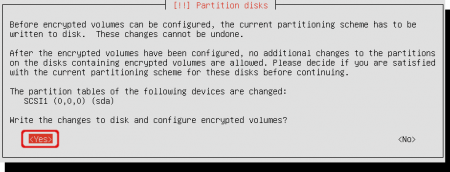
Confirm that you will write the changes to disk. Select ‘Yes’.
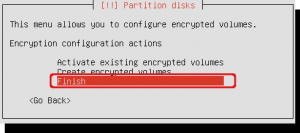
Select ‘Finish’ to close the encryption configuration options.
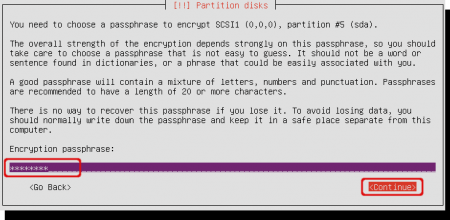
You are being asked to enter a password or passphrase for volume encryption. The longer and stronger the password, the better. Select ‘Continue’ when finished.

Re-enter the password or passphrase and select ‘Continue’.
Create LVM group inside the encrypted volume
Inside the encrypted volume we’re gonna create a LVM volume. The LVM is used for the swap partition and root filesystem.
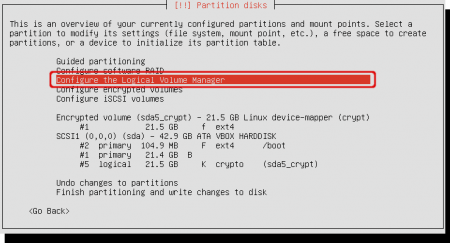
Note that partition #5 is the encrypted volume. For creating the LVM Select ‘Configure the Logical Volume Manager’.
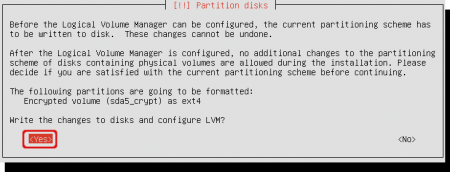
The partition wizard will write the previous changes to the harddisk. Select ‘Yes’ to confirm that.
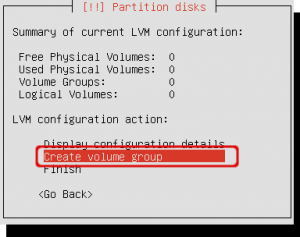
The summary window shows that no volume groups does yet exist. Select ‘Create volume group’.

Enter the name of the volume group to create. This can be any name. I called mine ‘LVMGroup’.
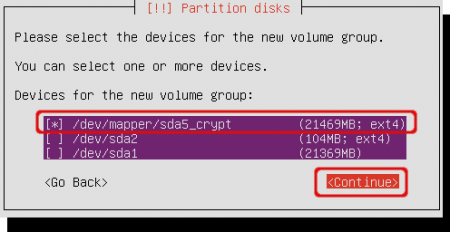
Choose where to create the volume group. Select the encrypted volume to create the volume group inside the encrypted volume. Place an asterisk with the spacebar and tab to ‘Continue’.
Create LVM logical volumes for swap and root filesystem inside LVM group
We have just created the volume group. Now we’re gonna create the logical volumes for the swap and root filesystem.
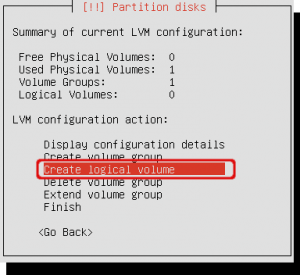
The summary window shows one existing volume group. Select ‘Create logical volume’ to create a logical volume.

Select the volume group you just created. Mine is called ‘LVMGroup’.

Select the name for the logical volume. Choose a name that matches the purpose. I called mine ‘LVM-SWAP’ because it will contain the swap space.

Select the size of the volume for swap purposes. For swap, it is recommended to use minimal the amount of RAM in your system. Better is twice your amount of RAM. Do not use the suggested amount, because that is the full volume group capacity.
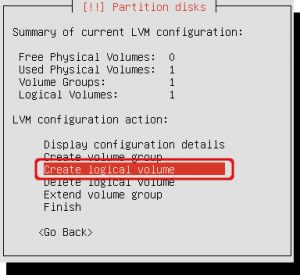
Click ‘Create logical volume’ again to create the second volume. This one is for the root filesystem.

Select the volume group again.

This logical volume is for the root filesystem, so i named it ‘LVM-ROOT’.

Accept the suggested amount of space. We use all of the space for the root filesystem. Select ‘Continue’.
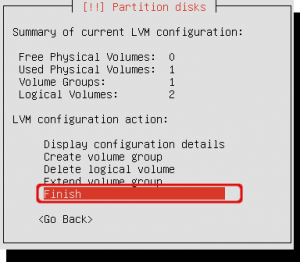
The summary shows that 2 logical volumes exist and 1 volume group. Click ‘Finish’ to quit the LVM configuration.
Create swap and root filesystem
The logical volumes for the swap and root filesystem are created. Now we need to configure them.
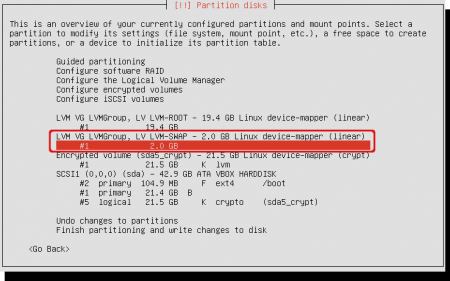
Select the available diskspace under the logical volume for the swap space. Not the LVM volume itself, but the capacity that belongs to it.
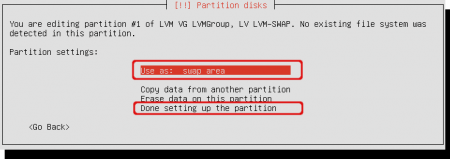
Change the ‘Use as’ to ‘swap area’. Just enter the ‘Use as’ field, a popup window will appear and select ‘swap area’ in there. After that select ‘Done setting up the partition’.
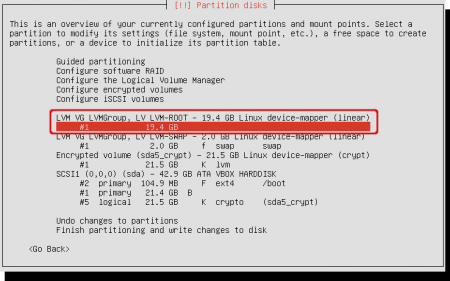
Now select the available diskspace under the logical volume for the root filesystem. Not the LVM volume itself, but the capacity that belongs to it.
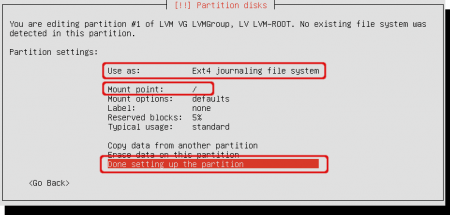
Change the ‘Use as’ to ‘Ext4 journaling file system’ and change the ‘Mount point’ to ‘/’ (root). Now it will mounted be as root when finished the installation. Select ‘Done setting up the partition’ when finished.
Finishing partitioning
All partitioning should now be done. Let’s check if everything is fine now and confirm the remaining changes.
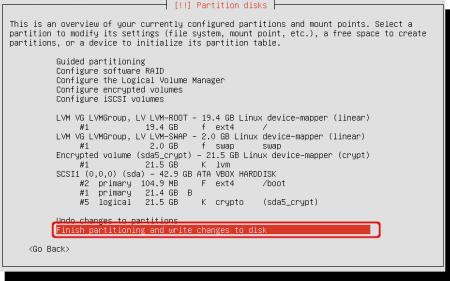
The window shows the current configuration. It is somehow complicated to read, but let’s give it a try.
Let’s start with the Physical device, called ‘SCSI1’. It has three partitions. The first (#2) is the 100 MB boot partition. Mountpoint is ‘/boot’. Note that this partition is not encrypted because it’s outside of any encrypted volume. The second partition (#1) is not used by the Linux installation, and that’s because it’s the Windows partition. It is encrypted with Truecrypt, but that’s not shown here. The last partition on the physical disk is #5. That partition is encrypted and called ‘sda5_crypt’.
Above of the ‘SCSI1’ volume is the encrypted volume ‘sda5_crypt’. The encrypted volume contains a 21.5 GB lvm volume.
At the top you will find two LVM’s inside the ‘LVMGroup’. First you will find the 19.4 GB partition mounted as ‘/’ (root). Below you will find the 2 GB swap space that’s also inside the LVM.
If all looks fine to you, click ‘Finish partitioning and write changes to disk’.
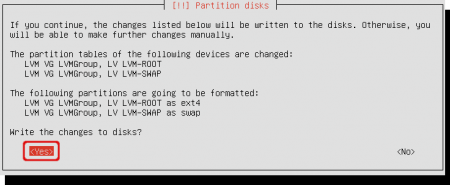
The partitioning wizard request you to confirm the remaining changes to the disk. Click ‘Yes’ to continue. The setup process continues and installs the Ubuntu operating system to your system.
Install grub inside partition
After a while, when most files are copied to your new system, the installer will ask you some information about the installation of bootloader Grub. Usually Grub is installed in the master boot record. We don’t want this because Truecrypt has its bootloader there. The screenshots below will tell you how to install the Grub bootloader inside the boot partition.
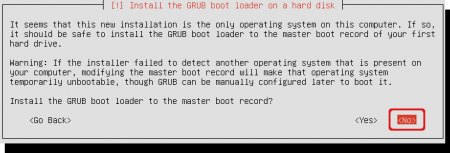
Choose ‘No’ when the setup ask you to install in the master boot record. When you choose ‘Yes’ accidentally you have to restore the Truecrypt bootloader by using the rescue CD that you created during the encryption setup and reinstall Grub inside the boot partition. See the Tips and troubleshooting part if you selected ‘Yes’ here.
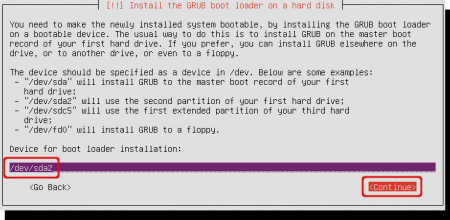
The installer asks you where to install the bootloader. In my case it is the boot partition ‘/dev/sda2’. If you don’t know which devicename belongs to the boot partition, read the next step (Do not hit continue yet…).

In case you didn’t know the devicename of the boot partition follow these instructions. Press ctrl+alt+F2 to start a new terminal. Hit enter to activate this windows. Now type ‘mount | grep boot’ and read which device was mounted as the target boot directory. In my case it is ‘/dev/sda2’. Return to the setup screen with ctrl+alt+F1 and continue with the previous step. Enter the devicename and hit ‘Continue’.
The setup process continues. When finished it will restart your system.
Ubuntu with encryption ready for use
Installation of Ubuntu is now finished. When rebooting you see the Truecrypt bootloader first.
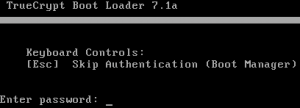
When rebooting the system starts the Truecrypt bootloader located in the master boot record. Hit the ‘Esc’ key to quit the Truecrypt bootloader.

When the ‘Esc’ key is pressed it wil continue booting. The loader finds that partition 2 is bootable and starts the bootloader inside that partition. This screen will only appear for a very short time and doesn’t need any user input.

Grub has started and activated the kernel and scripts inside the boot partition. The system requests the password for the encrypted volume. This is not the password for your user account. Ubuntu continues the booting process when entering the password.
Note: This screen looks nicer when the graphical capabilities are better then mine.
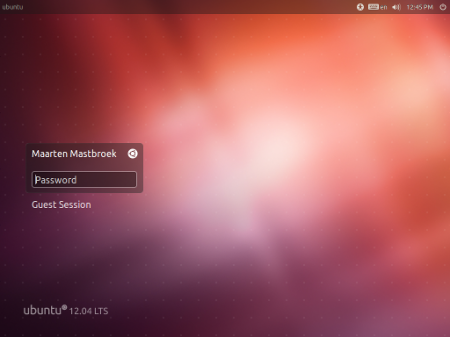
The Ubuntu login-screen appears. This password is related to your user account. Ubuntu is now ready and safe for use! Optionally, you can enable automatic login in the ‘System Settings’, ‘User Accounts’ window to disable this authentication step.

Leave a Reply