Yubikey for WordPress, Roundcube and Linux
Yubikey plugin for WordPress
I use WordPress as a blogging system for this site. At the moment of writing I use WordPress 3.4.1 which is the most recent version at time of writing, and added Yubikey support by the WordPress Yubikey plugin. The concept is to request an API Key which allows authentication by Yubico, install the plugin in WordPress, insert the API Key in your configuration and enable users to use the Yubikey for authentication. Installation manual is included on the plugins website.
Preparations: Get Yubico API Key
The Yubikey plugin needs access to Yubico servers for authentication. Yubico accepts authentication-requests only when the authentication data is provided with an valid ID and API key. These two can be obtained on a Yubico website for API Key requests. The URL to get the API key is https://upgrade.yubico.com/getapikey.
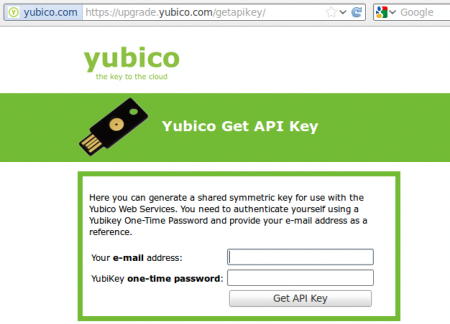
Visit the ‘Yubico Get API Key’ website on https://upgrade.yubico.com/getapikey. Insert your mail-address and press the touch-button of your Yubikey once to get the API Key and a Client ID. Keep these for later use.
Installation of the Yubikey plugin in WordPress
To install the plugin in WordPress follow the guide below.
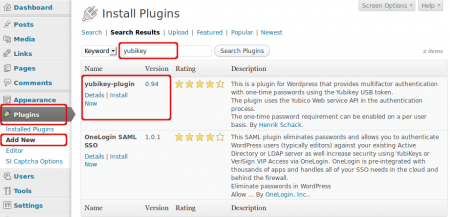
Login to the WordPress admin panel. Select ‘Plugins’, ‘Add new’ and search for ‘yubikey’. Two plugins will show up. Select the ‘Install Now’ link related to the ‘yubikey-plugin’.
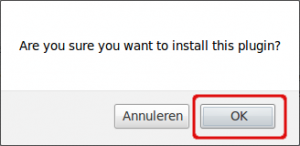
Click ‘OK’ to confirm the plugin installation.

The plugin is successfully installed. Select ‘Activate Plugin’ to activate it. At the moment you can still login without Yubikey, so you cannot lock yourself out.
Note: Version 0.94 of the plugin pointed to an outdated URL to get the API key. I contacted the developer which solved the problem in version 0.95.
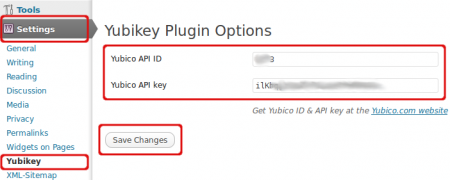
Go to ‘Settings’, ‘Yubikey’ and fill in your Yubico ‘API ID’ and ‘API Key’. Here you need to insert the client ID and API Key that you have previously received. The API Key and ID can be received from the website https://upgrade.yubico.com/getapikey.
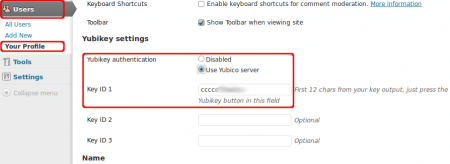
Last step is to configure your useraccount to login with the Yubikey. Go to ‘Users’, ‘Your Profile’ and select ‘Use Yubico server’. Simply press the touch-button of your Yubikey to assign the Yubikey to your account.
Note: You can only change your own settings, not those of other users. You cannot require a user to mandatory login with the Yubikey.
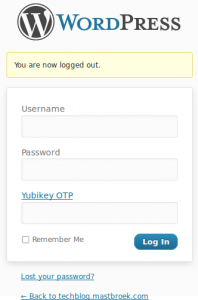
When the plugin is activated the login-page shows an extra authentication field. This field is required when a user has enabled the Yubikey for authentication in his settings. If the user has disabled Yubikey authentication or did not assign a Yubikey to his settings, the field can left empty during login.

Leave a Reply